Skip to content
Orqra
Browse documentation

Workflows

Build your first reusable workflow

A reusable creative pipeline keeps the structure of the work visible: what goes in, how it is processed, what comes out, and which preset should run next.

What you will complete

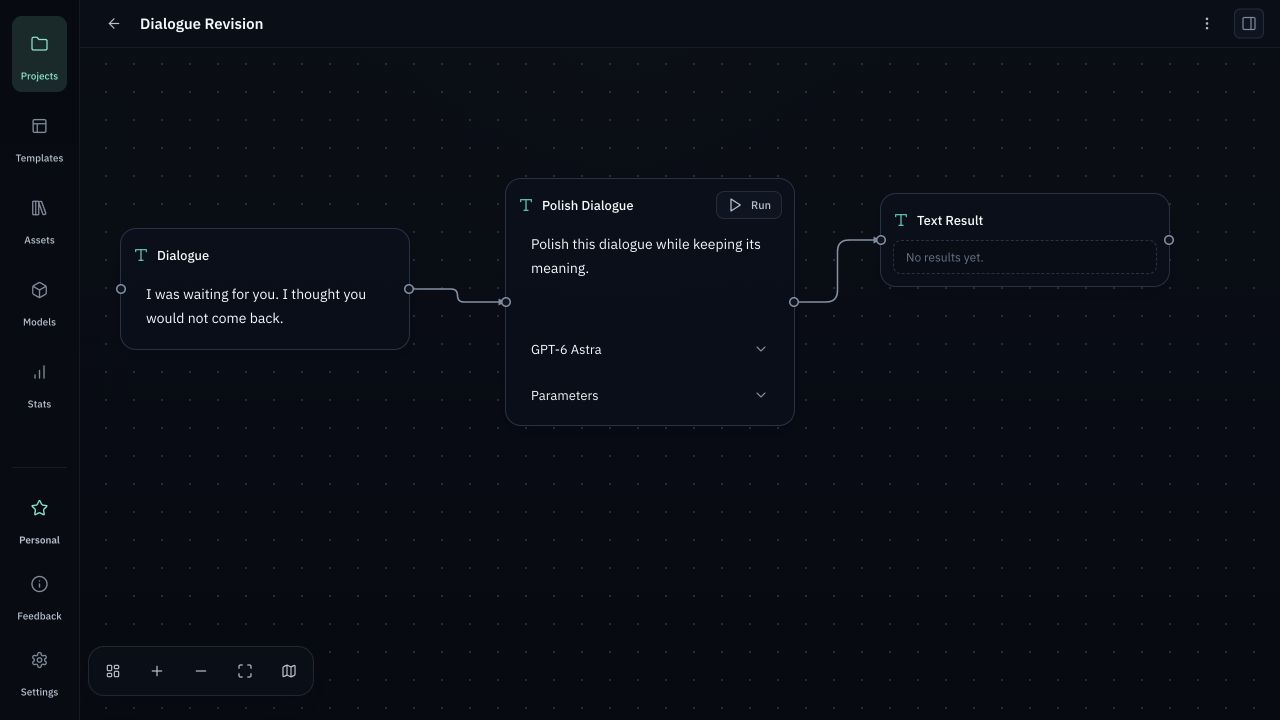
Create a project, add input and processing nodes, connect the flow, and choose the required model.

In this guide

  1. 1
    Connect a Provider — Open Models, add your own Provider credentials, choose models, save, and test the connection.
  2. 2
    Create a project — Create a project, add input and processing nodes, connect the flow, and choose the required model.
  3. 3
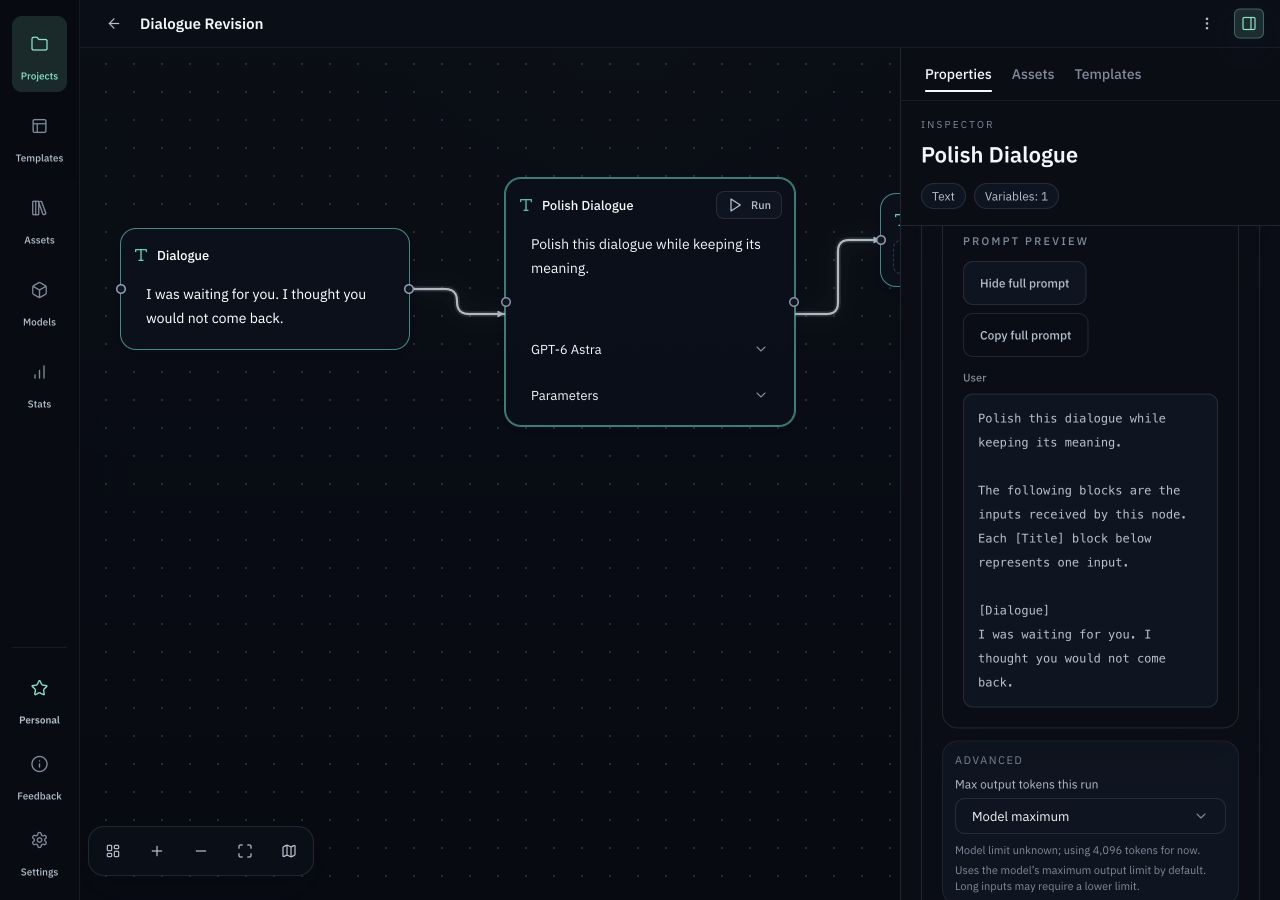
    Review and run — Insert reusable templates, inspect the request preview, then run only when the inputs, model, and parameters are correct.
Define the model, prompt structure, transformation rules, and expected output format.
Processing nodeThe processing node has a compatible enabled model, task instruction, and required inputs.
Insert reusable templates, inspect the request preview, then run only when the inputs, model, and parameters are correct.
Review and runRequest Preview shows the request you reviewed, and the Provider call begins only after your explicit run action.

Before you start

  • After installing a verified build, launch Orqra. Free starts without an account or License.
  • Open Models, add your own Provider credentials, choose models, save, and test the connection.
  • Model availability, capabilities, rate limits, and fees are controlled by the Provider. Orqra does not include AI credits.

Complete the task

  1. 1

    Projects

    Create a project

    Create a project, add input and processing nodes, connect the flow, and choose the required model.

    Expected result

    A new local project workspace is open and ready for a workflow.

  2. 2

    Add node

    Input node

    Collect scripts, references, prompts, assets, and project context before a run starts.

    Expected result

    The input node contains the source material or project context required for the task.

  3. 3

    Input node

    Processing node

    Define the model, prompt structure, transformation rules, and expected output format.

    Expected result

    The processing node has a compatible enabled model, task instruction, and required inputs.

  4. 4

    Processing node

    Output node

    Keep generated scenes, shot prompts, notes, and release tasks attached to the project.

    Expected result

    The nodes are connected in the intended input-to-processing-to-output direction.

  5. 5

    Output node

    Review and run

    Insert reusable templates, inspect the request preview, then run only when the inputs, model, and parameters are correct.

    Expected result

    Request Preview shows the request you reviewed, and the Provider call begins only after your explicit run action.

  6. 6

    Request Preview / Run

    Reusable preset

    Save the setup so the same creative process can be repeated, reviewed, and improved.

    Expected result

    The output stays attached to the project and the workflow can be reviewed, changed, and run again.

Checks before you retry

  • Creating or editing projects, nodes, and templates does not call a model Provider by itself.
  • Testing a connection and syncing models are separate Provider network actions. Prompt and selected inputs are sent only when you explicitly run a model step.
  • Support does not require uploading projects, prompts, outputs, local files, or model API keys to Orqra.